Knowing how to set up Wallet and Apple Pay on Mac is your first step to greater financial efficiency. You can then choose Apple Pay during checkoutenter your password or use Touch ID, and speed up your purchasing experience.
Set up Wallet and Apple Pay
You can setup yourwallet using the debit and credit cards you’ve added to the wallet on your iPhone or iPad. If you don’t have those devices, you can simply add cards and you’re ready to use Apple Pay.
Step 1: Open System Preferences using the icon in your Dock or Apple icon in the menu bar.
Step 2: Choose Wallet & Apple Pay.
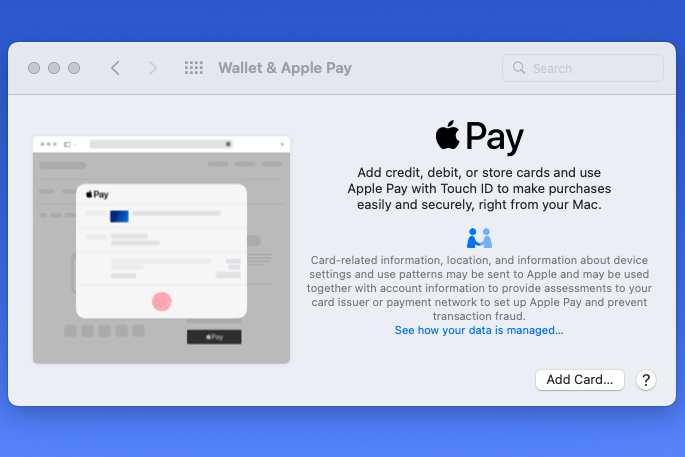
Step 3: When you initially select this option, you’ll see a setup screen. Select Add card to get started and sign in with your Apple ID if prompted.
Moving forward, you’ll simply see your Wallet where you can manage your payment methods when you open Wallet & Apple Pay.
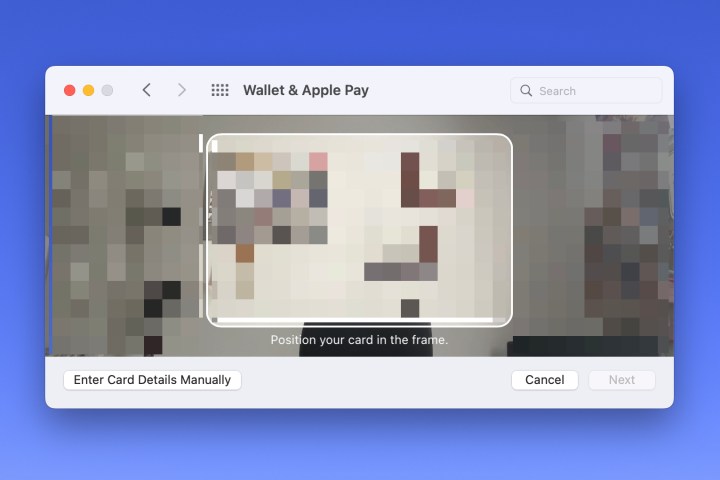
Step 4: If you don’t have cards in the wallet on your other devices, select Add card. Then, follow the prompts to either hold your card up to your Mac camera or enter the information manually.
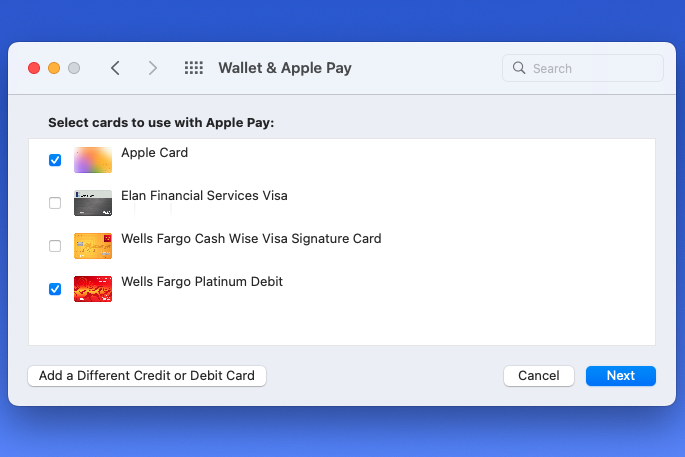
Step 5: If you do have cards in the wallet on your iPhone or iPad, you’ll see these listed. Check the boxes for those you want to use on your Mac and pick Next.
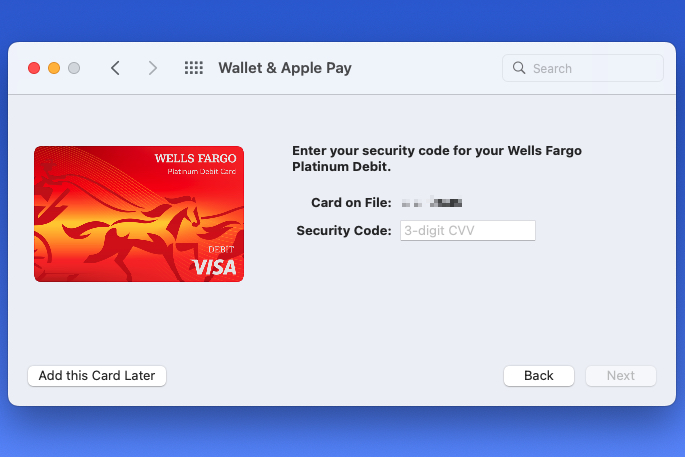
Step 6: Depending on the type of card you’re adding, you may be asked to enter or confirm additional information. For example, you may be prompted to add the CVV for a debit card.
After you provide the details, select Next.
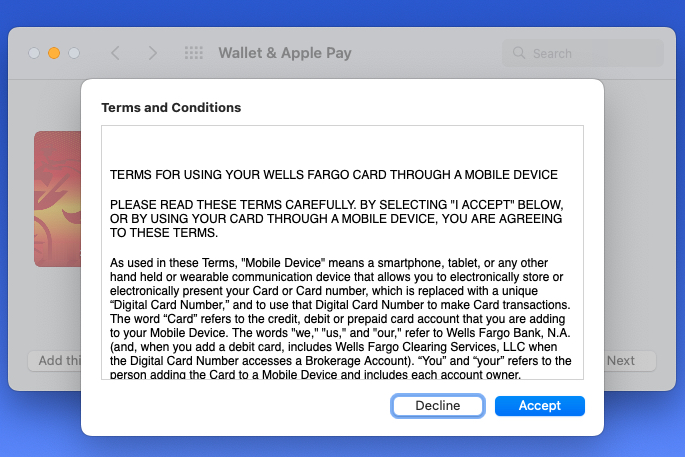
Step 7: Again, depending on the card type and corresponding bank, you may be asked to accept the terms and conditions. If so, select Accept to continue after you review the terms.
Step 8: You’ll see a brief message at the bottom of the window as your bank is contacted for approval to connect to Apple Pay.
When complete, select Done and you’re ready to use Apple Pay.

Adjust your payment preferences
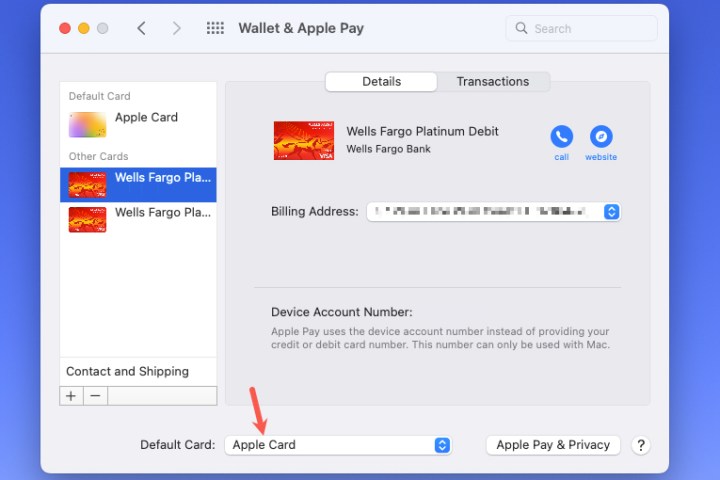
After you add or select cards for your wallet, you may want to review the attached details on the screen that displays.
Step 1: You’ll see your cards listed on the left with the default card at the top. To change the default, use the drop-down box at the bottom of the window to pick the card you want.
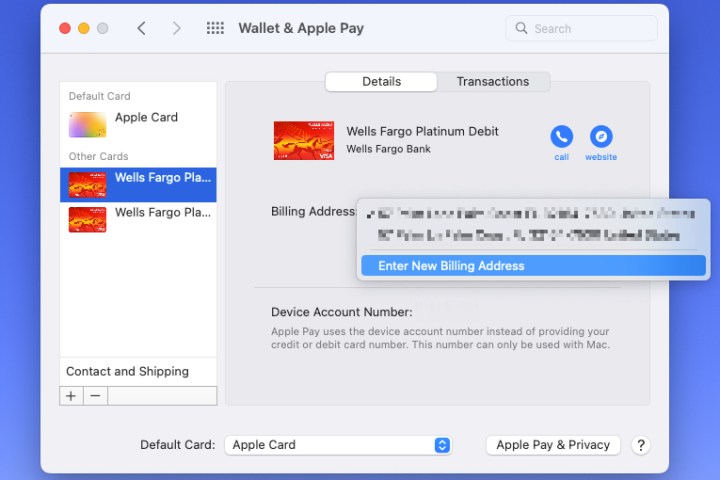
Step 2: You should see your billing address listed for each card you select on the left. If you need to change this, select the Billing address drop-down menu to pick Enter new billing address.
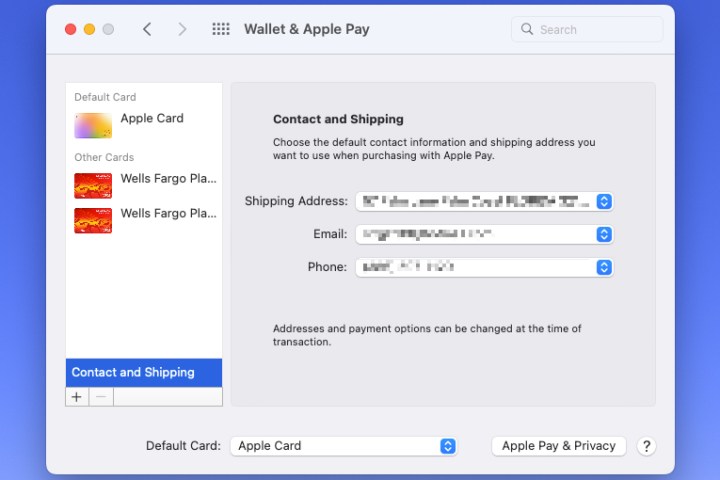
Step 3: You can also choose your default billing and shipping address. Select contact and shipping at the bottom of the card list on the left. Then make any changes to your shipping address, email address, or phone number on the right.
By setting up Wallet and Apple Pay on your Mac, you can make online purchases without hunting for your physical wallet and payment cards. Simply select the Apple Pay option, use Touch ID or enter your password, and you’ll save a ton of time during the checkout process.
For more tips on using Apple Wallet, look at how to add your driver’s license or how to add a boarding pass to Apple Wallet.
Editors’ Recommendations