A WebSocket API is an advanced technology designed for bidirectional communication between a web server and a client’s browser. It is an alternative to HTTP communication on the web that allows you to send messages to the server and receive event-driven responses without waiting for the server to respond. It offers persistent full duplex two-data communication with a low latency rate.
In layman’s terms, the web socket creates a permanent connection between client and server and both parties can start transmitting data at any time.
Read: Why I love WebSockets
Where to use WebSockets
WebSockets are useful for real-time web applications where data on the client side changes frequently. Some of the examples that WebSockets are used in are chat applications, stock exchange applications, and multiplayer games and so on.
But why should developers use web sockets when we already have various methods of handling real-time data communication? To understand the reasons for using WebSockets as an alternative to traditional HTTP communication, we first need to understand what technologies were previously used to handle real-time communication and what problems are associated with them.
What are alternatives to WebSockets?
Below is a list of some alternatives to WebSockets when it comes to handling real-time communication in the software development process.
opinion poll
Polling is a synchronous method in which the client uses an AJAX request to send a request to the server to see if data is available. The client then receives a response from the server with the required data. It receives the response from the server even if no data is available. Polling works well in scenarios where developers know the frequency of messages. However, in most real-time applications, message availability is often unpredictable. Therefore polling is not an ideal solution for real-time applications.
Great poll
Large polling is also known as a comet. It’s a method where the client connects to the server for a period of time. If the server does not have any information at this point, the client will continue to open the connection until data is available or the specified time limit is reached. The client has to constantly connect to the server in order to receive new data. Comet delays the HTTP response until the server has to send something back to the client. This technique is also known as a hanging –GET or a pending-POST. For this reason, large polling – or long polling – is also not a good choice for real-time applications.
Web socket connections offer a solution to meet the requirements of permanent two-way data communication. It provides low latency and a persistent connection for the transaction that can be processed by a server or a client. The next section shows how web sockets work and create a persistent connection using various events and methods.
Read: Establish persistent HTTP connections with the EventSource
How do WebSockets work?
A web socket object provides an API for managing a web socket connection between a client and a server. We will show you how to create web sockets in the following section.
Create a WebSocket connection
Open a web socket connection by calling the web socket constructor, as shown in the following code example:
var connection = new WebSocket (‘ws: // localhost: 4545, [‘soap’, ‘xmpp’]);
Note that the ‘connection’ here is a web socket object. ‘ws’ denotes the URL scheme for the WebSocket connection. There is also a secure version of web socket connections called ‘wss’ that works in the same way as https is used for secure HTTP connections.
The second argument in the constructor represents the sub-protocols. This is an optional parameter. These sub-protocols can be a string or an array of strings and must be one of the registered sub-protocols in the IANA registry.
Read: Getting started with WebSockets
WebSocket events
You can attach event handlers when you connect to the server to know when to open the connection, whether there have been errors, or if any messages are in.
WebSocket Event: Open
As soon as the connection is open, you can use the onOpen callback function to send the data to the server, as shown in the following code snippet:
connection.onopen = function () {connection.send (‘Connection opened successfully’); // send message to server};
WebSocket event message
The callback for the message event is ‘onmessage’. Websocket message events receive the data from the server.
// log messages from the server connection.onmessage = function (e) {console.log (‘Server says:’ + e.data); };
WebSocket event error
In the event of an error, there is an ‘onerror’ callback for the error event. Here is an example of how the WebSocket error event was encoded:
// log errors connection.onerror = function (error) {console.log (‘Errors:’ + error); };
Close the WebSocket event
With close you can close the connection established by the web socket. The ‘close’ event has a callback called ‘onclose’ for closing socket connections. Here is an example:
connection.onclose = function (message) {console.log (‘Connection closed’, e); };
Read: Optimization of the WebSockets bandwidth
WebSocket methods
Below is a list of WebSocket methods and sample code showing how to use them.
Using the send () WebSocket method
The send () method is used to send data over the connection. An exception is thrown if an error occurs or the connection is lost:
connection.send (‘This is a message for the server using WebSockets.’);
Using the close () WebSocket method
The close () method is used to end an existing connection. The close function takes two arguments – the first is a code (status code) and the second is a reason (a text string format) for closing:
connection.close (500, ‘The connection is being closed …’);
WebSocket use cases
You can use WebSockets when you need low latency and real-time connectivity between a server and a client. If your application requires a WebSocket, don’t forget to consider technologies such as event queuing when building your server-side applications. WebSockets can be used extensively in various applications such as:
- Social media streaming
- Chat applications
- Online multiplayer games
- Update location data on the fly
- Stock exchange applications
Implementing WebSockets in Node.js
‘ws’ is a popular library for using WebSockets in Node.js applications. To integrate WebSockets into your application, you first need to install npm’s ‘ws’ library with the following command:
npm init npm install ws
Now create a server.js file and write the following code into it:
const WebSocket = require (‘ws’) const connection = new WebSocket.Server ({port: 8080}) connection.on (‘connection’, ws => {connection.on (‘message’, message => {console.log (`Received message => $ {message}`)}) connection.send (‘Message From Server’)})
This code creates a new server on port 8080, which is the default port for WebSockets. It adds a callback function that sends the ‘Message from Server’ message to the client and logs the message received by the client.
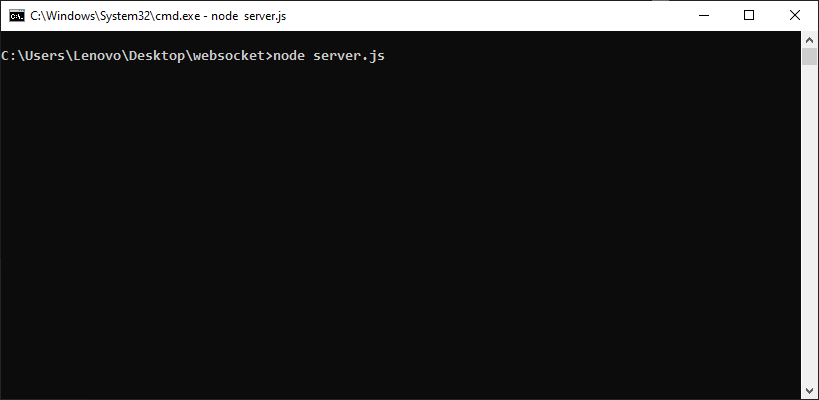
Open the command prompt and run the server with this command:
Node server.js
The next step is to create a client application by creating a file called client.js and adding the following code:
const WebSocket = require (‘ws’) const url = “ws: // localhost: 8080” const connection = new WebSocket (url) connection.onopen = () => {connection.send (‘Message From Client’)} connection .onerror = (error) => {console.log (`Errors: $ {error}`)} connection.onmessage = (e) => {console.log (e.data)}
Now run the client-side server with the following command:
Client.js node
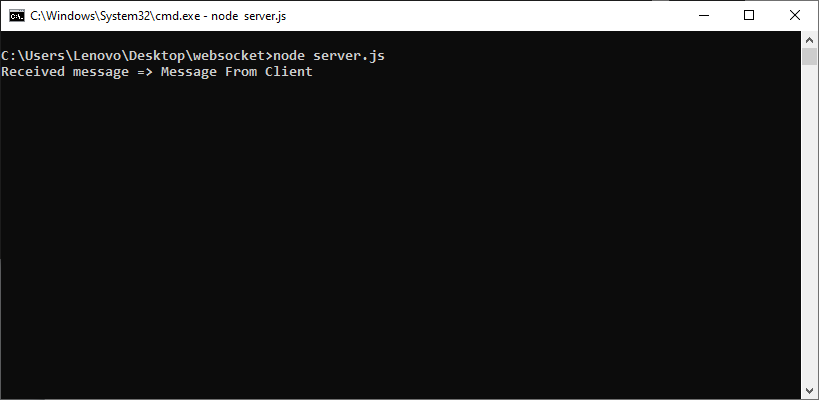
You should see the following output:
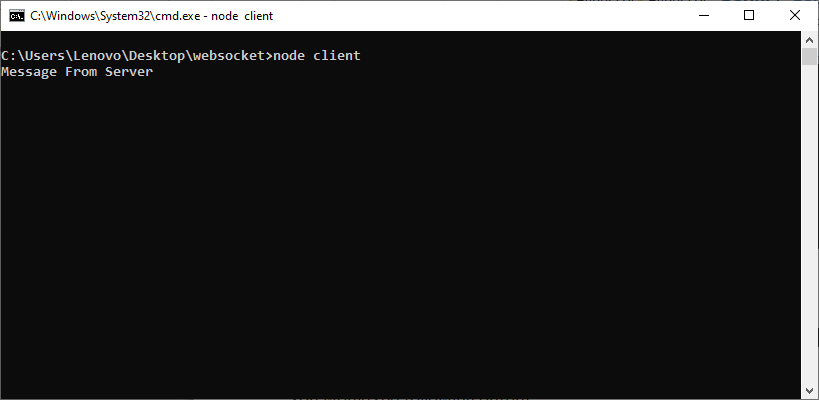
When you run the client app you will see a message sent from the server as shown in the screenshot above.
At the same time, a message from the client app is displayed on the server application, as shown in the following screenshot: