
ESP8266 and ESP32 are microcontrollers from the Chinese company Espressif. Microcontrollers are tiny computers with little processing power, memory, and space that interact with sensors, send infrared commands, and much more.
Espressif has achieved amazing things with the ESP devices: their devices have WiFi, are compatible with code for the popular Arduino microcontroller and they are inexpensive. Like, $ 5-inclusive-shipping-from-china-cheap (AliExpress) or $ 15 for 2 people Amazon cheap. So cheap that they are the de facto standard for microcontrollers used in IoT products for both manufacturers and developers in the DIY sector.
Quindor and DrZzs play with an ESP32-based QuinLED with WLED (Youtube)
Microcontrollers are just computers and nothing without their software. Open source software like ESPHome, WLED and
Tasmota allow users to turn their ESP8266 and ESP32 devices into powerful little machines that can collect information and control devices. In your home, microcontrollers are the eyes and ears, while the home assistant is the brain.
But these projects all have one problem in common: Getting started is difficult. We identified three pain points:
- Installation of the software on the microcontroller.
- Connect the microcontroller to your wireless network.
- Configure the software on the microcontroller.
These vulnerabilities stand in the way of creators from reaching a wider audience. Making local home automation a success is our mission, and these projects and all the opportunities they open are an important part of that.
Today we’re going to introduce some things that will make microcontrollers easier to use.
Use terms that everyone understands
We’re going to start using words that a user understands rather than forcing the technical terms on them. Terms like “firmware” and “flashing” are the correct terminology, but for inexperienced users they do more harm than good. They will make the user feel uncomfortable before they even start.
Instead of “Upload Firmware” we updated the ESPHome dashboard to talk about “Install”. We encourage other projects to do the same.
Things get more technical as a user continues to play with microcontrollers. But that change might just be the small thing why they will actually move on.
ESP Web Tools: Install projects on your microcontroller via the browser
We created ESP web tools. ESP Web Tools makes great onboarding for project websites by allowing users to install the software on their microcontrollers through their browser. All the user has to do is connect their microcontroller to their computer and hit the “Install” button on the website. ESP Web Tools will automatically select and install the correct build for your microcontroller.
This works for both the ESP8266 and the ESP32 and with every project for these devices. This technology is supported by Web Serial, a web standard for serial communication that is part of Google Chrome and Microsoft Edge.
ESP Web Tools Web was already onboarded by
WLED and ESP Simple.
Learn how to add ESP Web Tools to your website
If you have an ESP32 or ESP8266 device on hand, you can try it out right here:
ESP web tools used code written by
@MakerMelissa from Ada fruit. We’re currently relying on an improved fork that will suit a wider range of use cases, including ours. We opened a pull request to get our changes back.
Note: We do not want to use technology that is not available in all browsers and cannot be made available in any other way. In this case, however, the advantages outweigh the disadvantages. We hope that Firefox and WebKit will add support for Web Serial in the future.
Improv Wi-Fi: Open standard for providing Wi-Fi credentials via Bluetooth Low Energy
We created Improve WiFi. Improv Wi-Fi is a free and open standard that anyone can use to provide a convenient way for users to connect their devices to the wireless network.
![]()
There are two common ways for open source firmware to trick a device into connecting to your wireless network. The device sets up a wireless network and you need to connect to it through your phone or laptop, or the user will compile the network and password into the firmware before installing it on the ESP. Both methods are difficult, error-prone, and provide a poor user experience.
If you look at off-the-shelf products, you’ll see a different approach: send Wi-Fi credentials to the device via Bluetooth Low Energy (BLE). BLE enables the user to get instant feedback when something goes wrong. This technology is used in many products, but there is no open standard that can be freely implemented. Improv Wi-Fi is an open standard that can be freely implemented.
Open source projects often host their control interface as a website on the ESP device. Improv Wi-Fi supports this and when the deployment is complete the user can be redirected to a URL to complete the onboarding.
Improv Wi-Fi can be used today to provide running ESP32 microcontrollers
ESPHome (ESP8266 devices do not support BLE). Users will soon be able to provision devices with the Improv Wi-Fi service through the Home Assistant Android and iOS apps. All of these implementations are open source and can be used in your projects.
Improv Wi-Fi is also available for the web in the form of a button that can be added to your website. This allows users to configure and set up a device from any browser that supports web bluetooth.
If you used the install button in the previous section but haven’t yet connected it to the wireless network, you can include this device here:
ESPHome Dashboard: simplified and optimized
With ESPHome Users don’t program microcontrollers, they configure them. Let ESPHome know that there is a temperature sensor on pin 3 of your ESP device and ESPHome will install custom software on your ESP device that will make this information available in Home Assistant.
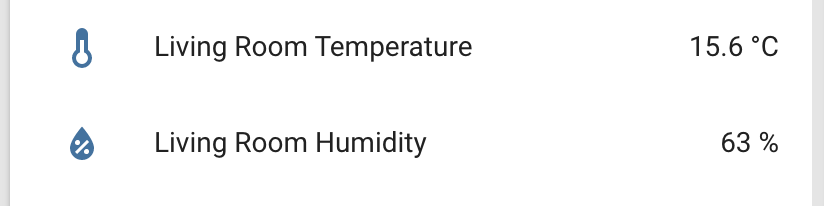
# Example ESPHome configuration sensor: – Platform: dht pin: D2 Temperature: Name: “Living Room Temperature” Humidity: Name: “Living Room Humidity” update_interval: 60s
The ESPHome dashboard has been updated with a simplified and optimized wizard for new configurations. You now enter the name of your project and your WLAN access data and it will be installed on your ESP device via the browser. All further updates are then carried out wirelessly.
ESPHome: accepting projects
We want to make it easy for developers to sell ESPHome-based products that offer a great user experience. ESPHome projects include local control and integrate well with Home Assistant, so every additional ESPHome product our users can buy is a win.
To make it easier to keep developers and users connected after installing a product, projects can now add a project ID and version to their firmware (Documents). With today’s version, this information will be available in the device information, the log output and the mDNS detection information.
The aim is to integrate the projects more closely into the ESPHome dashboard by displaying the project logo, linking to the documentation and problem pages and enabling updates to be installed.
Why are we building this
Home Assistant’s mission is to make local home automation a viable alternative to cloud-based solutions and to make it accessible to everyone.
In order to realize this mission, we founded the company Nabu Casa. Together with the community, Nabu develops Casa Home Assistant and ESPHome and is financed exclusively by people who support this mission. No investors or loans.
If you want to fund our work, subscribe Home Assistant Cloud.